
“Step-by-Step Guide: Setting Up a VPS to Host Multiple Applications with Subdomains”
Description:
“In this blog post, I’ll share my experience configuring a Hostinger VPS to host multiple applications running on PHP, Python, and Node.js, each with its own subdomain. Learn how to manage different versions of PHP, set up a reverse proxy with Nginx, secure your applications with SSL, and document the process for adding new domains in the future.”
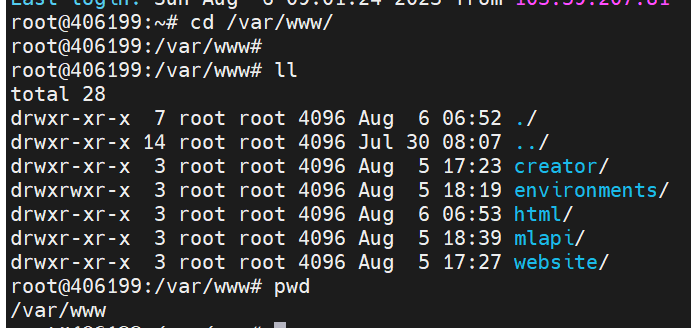
Step 1 — Creating the Directory Structure
The first step is to create a directory structure that will hold the site data that you will be serving to visitors.
Your document root, the top-level directory that Apache looks at to find content to serve, will be set to individual directories under the /var/www directory. We will create a directory here for each of the virtual hosts.Within each of these directories, We will create a public_html directory. The public_html directory contains the content that will be served to your visitors. The parent directories, named here as domain1,domain2,domain3,domain4 will hold the scripts and application code to support the web content.
Use these commands
Mkdir -p /var/www/creator/public_html
Mkdir -p /var/www/website/public_html
Mkdir -p /var/www/mlapi/public_html
Mkdir -p /var/www/html/nodejs 🡪(API Domain)
Step 2 — Granting Permissions
We’ve created the directory structure for our filesin root user, they are owned by the root user. If you want your regular user to be able to modify files in these web directories, you can change the ownership with these commands:
chown -R $USER:$USER /var/www/creator/public_html
chown -R $USER:$USER /var/www/website/public_html
chown -R $USER:$USER /var/www/mlapi/public_html
chown -R $USER:$USER /var/www/html/nodejs/
The $USER variable will take the value of the user you are currently logged in as when you press ENTER. By doing this, the regular user now owns the public_html subdirectories where you will be storing your content.
You should also modify your permissions to ensure that read access is permitted to the general web directory and all of the files and folders it contains so that the pages can be served correctly:
chmod -R 755 /var/www
Your web server now has the permissions it needs to serve content, and your user should be able to create content within the necessary folders. The next step is to create content for your virtual host sites.
Step 3 — Creating Default Pages for Each Virtual Host
For virtual host creator.mtesthub.in
With your directory structure in place, you can start focusing on each individual virtual host site and the content within that site. Start by creating an index.html page for your first site creator.mtesthub.in Open and create the index.html file with your preferred text editor. This example uses vi: editor
CD /var/www/creator/public_html
Vi index.htmlhtml>
<!DOCTYPE html>
<html>
<head>
<title>Web Server Test</title>
</head>
<body>
<h1>Web Server Test Page for creator.mtesthub.in</h1>
<p>If you see this page, your web server is working correctly!</p>
</body>
</html>
Then press Esc key enter wq for save and exit from vim editor
For virtual host website.mtesthub.in
With your directory structure in place, you can start focusing on each individual virtual host site and the content within that site. Start by creating an index.html page for your first site website.mtesthub.in Open and create the index.html file with your preferred text editor. This example uses vi:editor
CD /var/www/website/public_html
Vi index.htmlhtml>
<!DOCTYPE html>
<html>
<head>
<title>Web Server Test</title>
</head>
<body>
<h1>Web Server Test Page for website.mtesthub.in </h1>
<p>If you see this page, your web server is working correctly!</p>
</body>
</html>
Then press Esc key enter wq for save and exit from vim editor
For virtual host mlapi.mtesthub.in
With your directory structure in place, you can start focusing on each individual virtual host site and the content within that site. Start by creating an index.html page for your first site mlapi.mtesthub.in Open and create the index.html file with your preferred text editor. This example uses vi:editor
CD /var/www/mlapi/public_html
Vi index.htmlhtml>
<!DOCTYPE html>
<html>
<head>
<title>Web Server Test</title>
</head>
<body>
<h1>Web Server Test Page for mlapi.mtesthub.in </h1>
<p>If you see this page, your web server is working correctly!</p>
</body>
</html>
Then press Esc key enter wq for save and exit from vim editor
Step 4 — Creating New Virtual Host Files
Virtual host files are the files that specify the actual configuration of your virtual hosts and dictates how the Apache web server will respond to various domain requests.
Apache comes with a default virtual host file called 000-default.conf. You can copy this file to create virtual host files for each of your domains.
Copy the default configuration file over to the first domain
cp /etc/apache2/sites-available/000-default.conf /etc/apache2/sites-available/creator.mtesthub.in.conf
cp /etc/apache2/sites-available/000-default.conf /etc/apache2/sites-available/website.mtesthub.in.conf
cp /etc/apache2/sites-available/000-default.conf /etc/apache2/sites-available/mlapi.mtesthub.in.conf
Be aware that the default Ubuntu configuration requires that each virtual host file end in .conf.
Open the new file in your preferred text editor with root privileges:
Vi /etc/apache2/sites-available/creator.mtesthub.in.conf
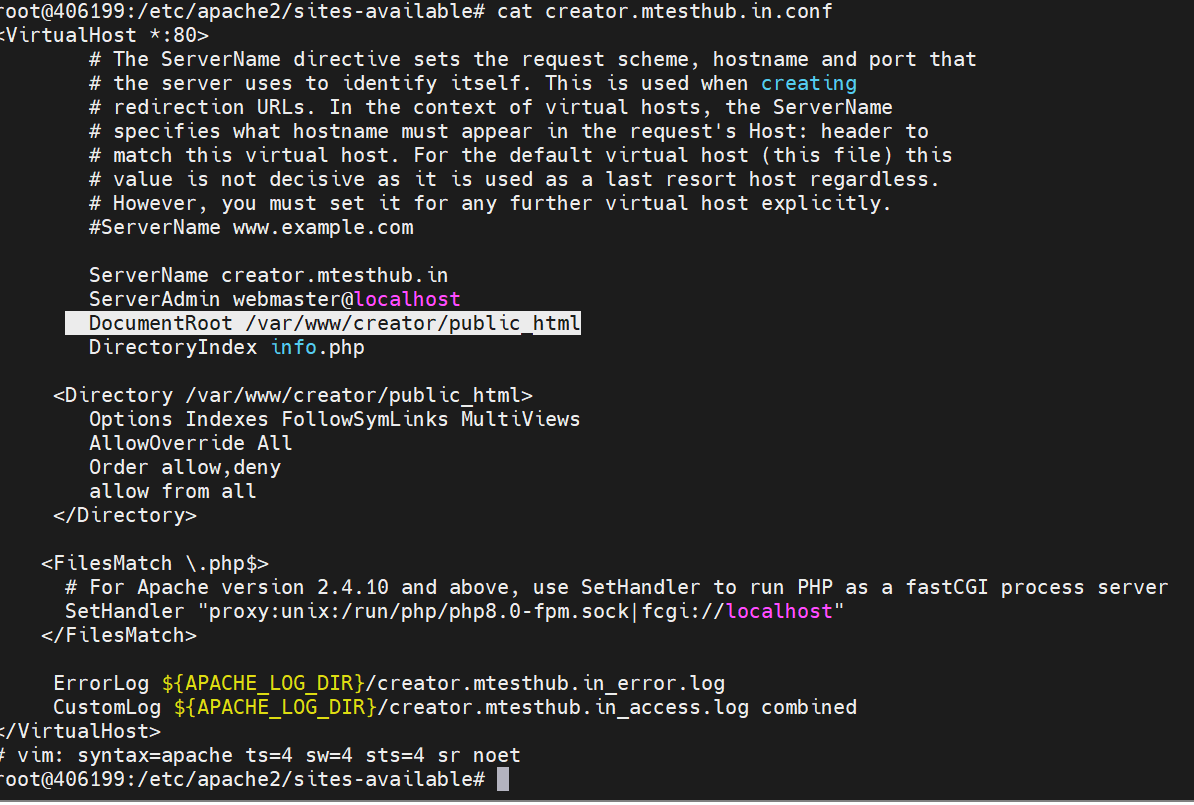
After edit save and exit from vi editor
Vi /etc/apache2/sites-available/website.mtesthub.in.conf

After edit save and exit from vi editor
Vi /etc/apache2/sites-available/mlapi.mtesthub.in.conf
After edit save and exit from vi editor
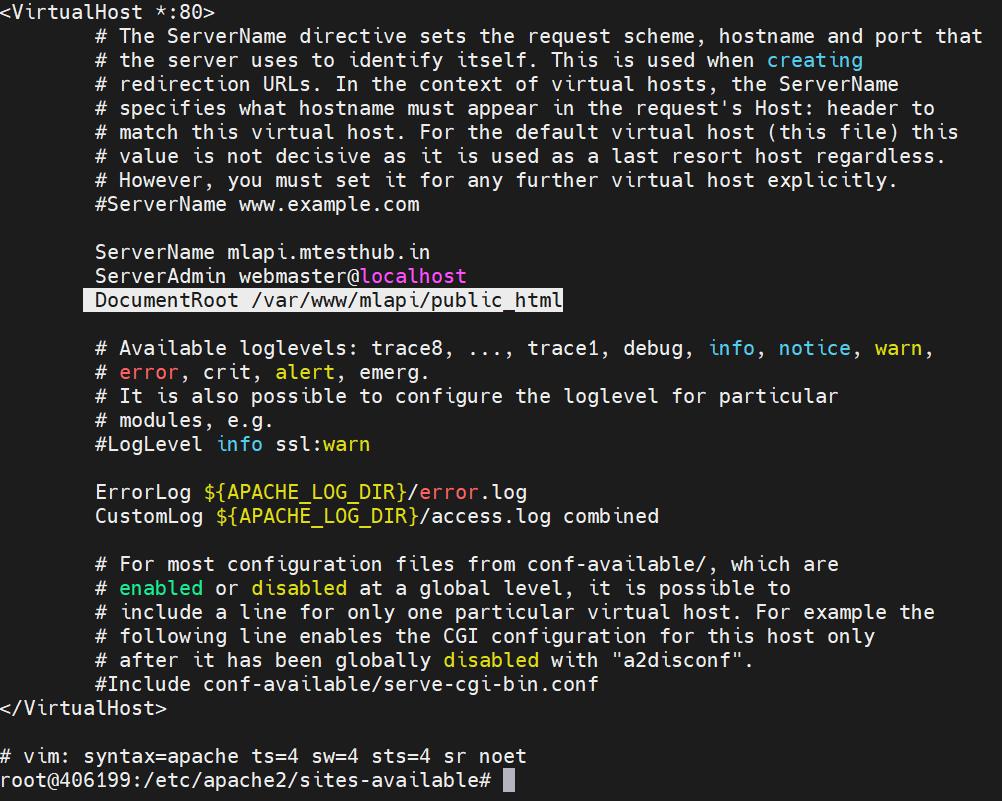
In vi editor edit and cross check the Server name and Document Root directory structure. The first, called ServerName, establishes the base domain for the virtual host definition. This is useful for matching additional hosts you defined. For instance, you set the ServerName directive to creator.mtesthub.in and Document root /var/www/creator/public_html . repeat this task in rest two virtual host website.mtesthub.in and mlapi.testhub.in.
Step 5 — Enabling the New Virtual Host Files
Now that you have created your virtual host files, you must enable them. Apache includes some tools that allow you to do this.
You’ll be using the a2ensite tool to enable each of your sites.
Use the following commands to enable your virtual host sites:
a2ensite creator.mtesthub.in.conf
a2ensite website.mtesthub.in.conf
a2ensite mlapi.mtesthub.in.conf
There will be output for both sites, similar to the example below, reminding you to reload your Apache server:
Output
Enabling site creator.mtesthub.in
To activate the new configuration, you need to run:
systemctl reload apache2
Before reloading your server, disable the default site defined in 000-default.conf by using the a2dissite command:
a2dissite 000-default.conf
Output
Site 000-default disabled.
To activate the new configuration, you need to run:
systemctl reload apache2
Next, test for configuration errors:
apache2ctl configtest
The should receive the following output:
Output
. . .
Syntax OK
Then task are finished, restart Apache to make these changes take effect.
systemctl restart apache2
systemctl status apache2
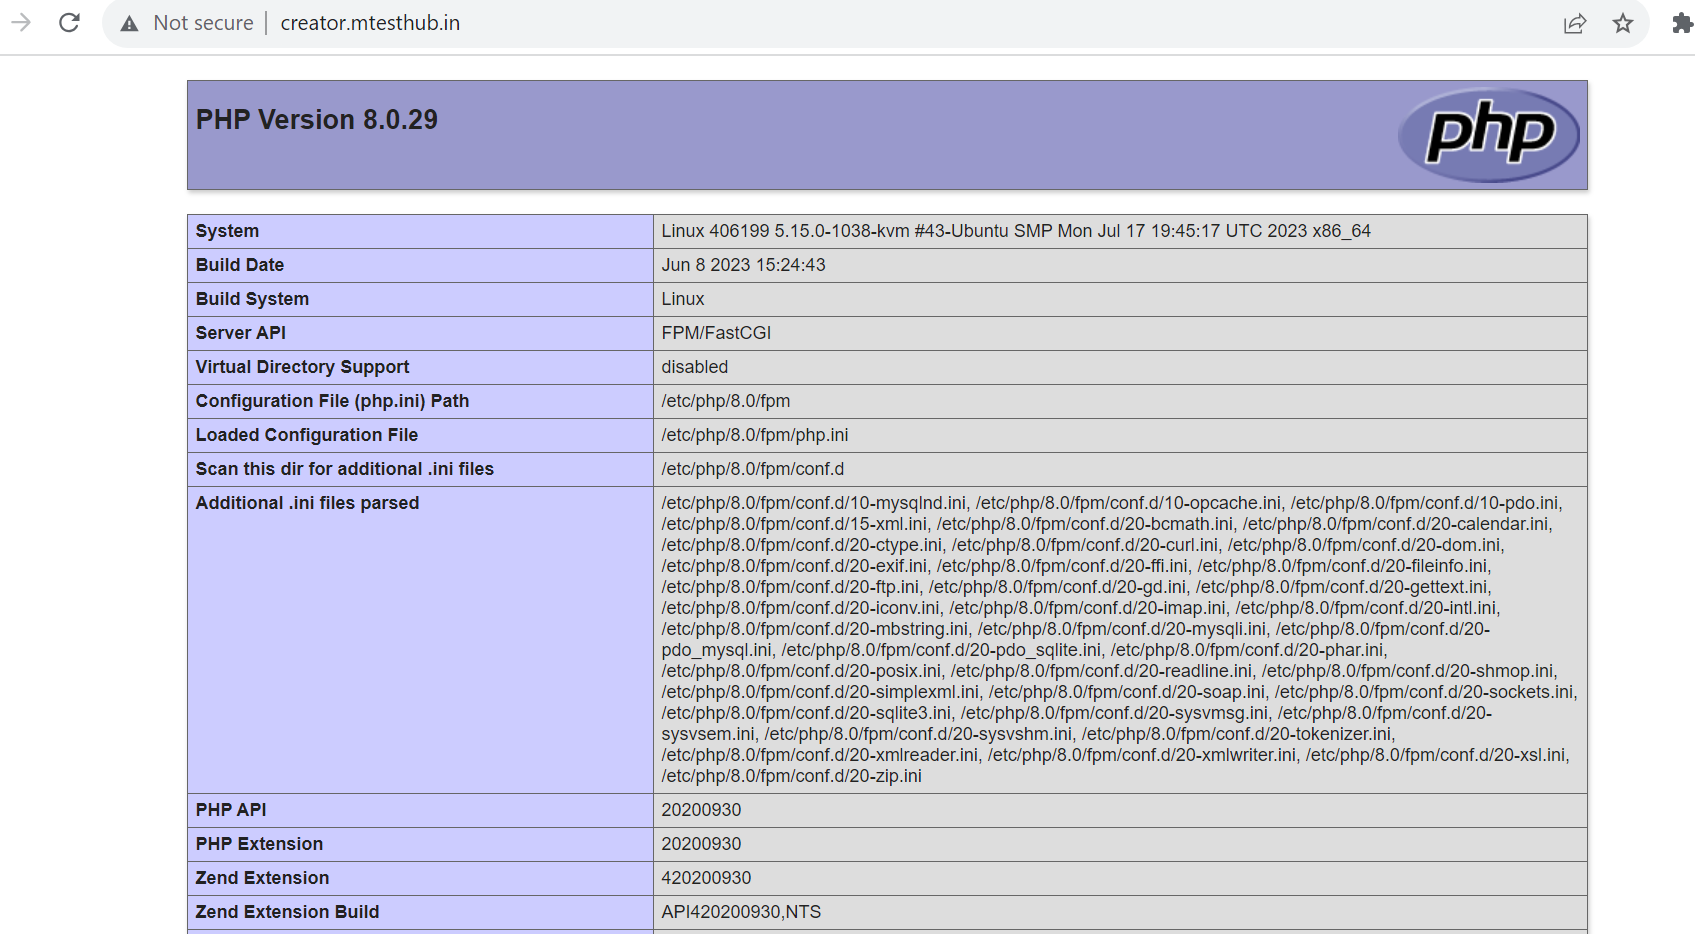
Step 7 — Testing Your Results
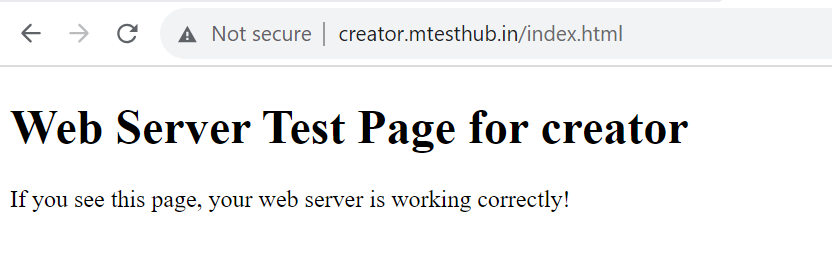
Creator.mtesthub.in website configured in PHP 8.0
Creator.mtesthub.in Index.html page
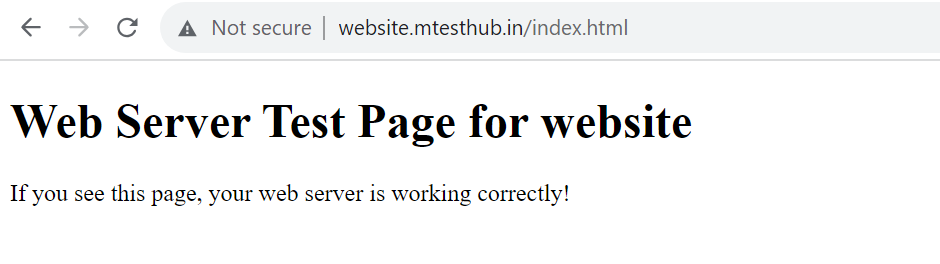
Website.mtesthub.in configured with PHP 7.4
Website.mtesthub.in index.html page
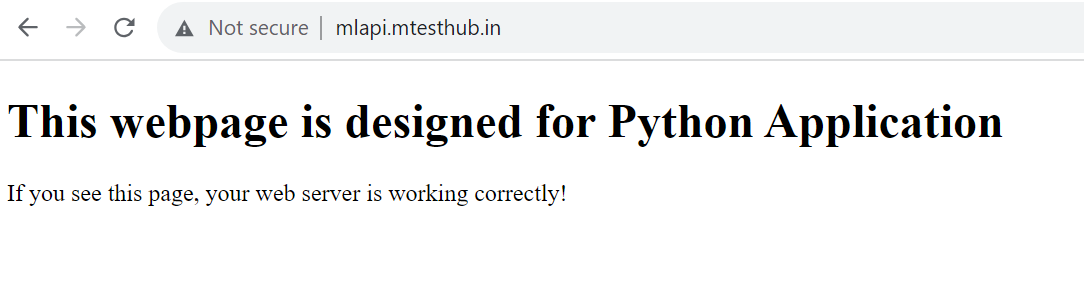
Mlapi.mtesthub.in configured with Python3.10
Set up a Node.js app for a virtual host api.mtesthub.in with Apache on Ubuntu
Install Node.js
Update your server’s packages and install curl with the following commands:
sudo apt-get update
sudo apt-get install curl
Copy
Download the Node.js personal package archive (PPA). This contains a more recent Node.js version than the Ubuntu repositories:
curl -sL https://deb.nodesource.com/setup_6.x -o nodesource_setup.sh
Run the nodesource_setup.sh command to add the PPA to your server’s package cache:
bash nodesource_setup.sh
Afterwards, install Node.js:
sudo apt-get install nodejs
Copy
This will automatically install npm as well.
Finally, install the build-essential package for npm:
sudo apt-get install build-essential
Create a sample Node.js application
For this example, we will begin by creating a separate directory in your website’s document root for housing Node.js applications:
sudo mkdir /var/www/html/nodejs
Create the file hello.js in this directory:
sudo nano /var/www/html/nodejs/hello.js
Add the following example content to the file:
#!/usr/bin/env nodejs
var http = require(‘http’);
http.createServer(function (request, response) {
response.writeHead(200, {‘Content-Type’: ‘text/plain’});
response.end(‘Hello World! Node.js is working correctly.\n’);
}).listen(8080);
console.log(‘Server running at http://127.0.0.1:8080/’);
Save and exit the file and make the file executable:
sudo chmod 755 hello.js
Install PM2
Use npm to install PM2 with the command:
sudo npm install -g pm2
Start the hello.js example script that you’ve just created with the command:
sudo pm2 start hello.js
As root add PM2 to the startup scripts, so that it will automatically restart if the server is rebooted:
sudo pm2 startup systemd
Top of Form
Bottom of Form
Configure Apache
To access the Node.js script from the web, install the Apache modules proxy and proxy_http with the commands:
sudo a2enmod proxy
sudo a2enmod proxy_http
Once the installation is complete, restart Apache for the changes to take effect:
sudo service apache2 restart
Next, you will need to adjust the Apache proxy configurations. The following directives need to be inserted into the VirtualHost command block in the site’s main Apache configuration file.
By common convention, this Apache configuration file is usually /etc/apache2/sites-available/api.mtesthub.in on Ubuntu.
Note
The location and filename of a site’s Apache configuration file can vary.
Edit this file with your editor of choice, for example with the command:
sudo vi /etc/apache2/sites-available/api.mtesthub.conf
Scroll through the file until you find the VirtualHost command block, which will look like:
<VirtualHost *:80>
ServerName example.com
<Directory “/var/www/nodejs/html”>
AllowOverride All
</Directory>
</VirtualHost>
Add the following to VirtualHost command block:
ProxyRequests Off
ProxyPreserveHost On
ProxyVia Full
<Proxy *>
Require all granted
</Proxy>
<Location /nodejs>
ProxyPass http://127.0.0.1:8080
ProxyPassReverse http://127.0.0.1:8080
</Location>
Be sure to put these lines outside any Directory command blocks. For example:
<VirtualHost *:80>
ServerName api.mtesthub.in
ProxyRequests Off
ProxyPreserveHost On
ProxyVia Full
<Proxy *>
Require all granted
</Proxy>
<Location /nodejs>
ProxyPass http://127.0.0.1:8080
ProxyPassReverse http://127.0.0.1:8080
</Location>
<Directory “/var/www/nodejs/html”>
AllowOverride All
</Directory>
</VirtualHost>
Save and exit the file, then restart Apache for the changes to take effect:
sudo services apache2 restart`
After restarting Apache, you can test the application by viewing it in a browser. You should see the following message from the test file you created earlier:
Hello World! Node.js is working correctly.

Use npm to install PM2 with the command:
sudo npm install -g pm2
Start the hello.js example script that you’ve just created with the command:
sudo pm2 start hello.js
As root add PM2 to the startup scripts, so that it will automatically restart if the server is rebooted:
sudo pm2 startup systemd
Step 1 — Installing PHP Versions 7.4 and 8.0 with PHP-FPM
With the prerequisites completed, you will now install PHP versions 7.4 and 8.0, as well as PHP-FPM and several additional extensions. But to accomplish this, you will first need to add the Ondrej PHP repository to your system.
Execute the apt-get command to install software-properties-common:
sudo apt-get install software-properties-common –y
The software-properties-common package provides the apt-add-repository command-line utility, which you will use to add the ondrej/php PPA (Personal Package Archive) repository.
Now add the ondrej/php repository to your system. The ondrej/php PPA will have more up-to-date versions of PHP than the official Ubuntu repositories, and it will also allow you to install multiple versions of PHP in the same system:
sudo add-apt-repository ppa:ondrej/php
Update the repository:
sudo apt-get update -y
Next, install php7.4, php7.4-fpm, php7.4-mysql, libapache2-mod-php7.4, and libapache2-mod-fcgid with the following commands:
sudo apt-get install php7.4 php7.4-fpm php7.4-mysql libapache2-mod-
php7.4 libapache2-mod-fcgid -y
- php7.4 is a metapackage used to run PHP applications.
- php7.4-fpm provides the Fast Process Manager interpreter that runs as a daemon and receives Fast/CGI requests.
- php7.4-mysql connects PHP to the MySQL database.
- libapahce2-mod-php7.4 provides the PHP module for the Apache webserver.
- libapache2-mod-fcgid contains a mod_fcgid that starts a number of CGI program instances to handle concurrent requests.
Now repeat the process for PHP version 8.0. Install php8.0, php8.0-fpm, php8.0-mysql, and libapache2-mod-php8.0:
sudo apt-get install php8.0 php8.0-fpm php8.0-mysql libapache2-mod-php8.0 -y
After installing both PHP versions, start the php8.0-fpm service:
sudo systemctl start php8.0-fpm
Next, verify the status of the php8.0-fpm service:
sudo systemctl status php8.0-fpm
You’ll see the following output:
Output
● php8.0-fpm.service – The PHP 8.0 FastCGI Process Manager
Loaded: loaded (/lib/systemd/system/php8.0-fpm.service; enabled; vendor preset: enabled)
Active: active (running) since Sun 2020-03-29 12:53:23 UTC; 15s ago
Docs: man:php-fpm8.0(8)
Process: 20961 ExecStopPost=/usr/lib/php/php-fpm-socket-helper remove /run/php/php-fpm.sock /etc/php/7.0/fpm/pool.d/www.conf 70 (code=exited,
Process: 20979 ExecStartPost=/usr/lib/php/php-fpm-socket-helper install /run/php/php-fpm.sock /etc/php/8.0/fpm/pool.d/www.conf 70 (code=exite
Main PID: 20963 (php-fpm8.0)
Status: “Processes active: 0, idle: 2, Requests: 0, slow: 0, Traffic: 0req/sec”
Tasks: 3 (limit: 1150)
CGroup: /system.slice/php8.0-fpm.service
├─20963 php-fpm: master process (/etc/php/8.0/fpm/php-fpm.conf)
├─20977 php-fpm: pool www
└─20978 php-fpm: pool www
Repeating this process, now start the php8.0-fpm service:
sudo systemctl start php8.0-fpm
And verify the status of the php8.0-fpm service:
sudo systemctl status php8.0-fpm
You’ll see the following output:
Output
● php7.2-fpm.service – The PHP 8.0FastCGI Process Manager
Loaded: loaded (/lib/systemd/system/php7.2-fpm.service; enabled; vendor preset: enabled)
Active: active (running) since Sun 2020-03-29 12:53:22 UTC; 45s ago
Docs: man:php-fpm8.0(8)
Main PID: 20897 (php-fpm8.0)
Status: “Processes active: 0, idle: 2, Requests: 0, slow: 0, Traffic: 0req/sec”
Tasks: 3 (limit: 1150)
CGroup: /system.slice/php8.0-fpm.service
├─20897 php-fpm: master process (/etc/php/8.0/fpm/php-fpm.conf)
├─20909 php-fpm: pool www
└─20910 php-fpm: pool www
Lastly, you must enable several modules so that your Apache2 service can work with multiple PHP versions:
sudo a2enmod actions fcgid alias proxy_fcgi
- actions is used for executing CGI scripts based on media type or request method.
- fcgid is a high performance alternative to mod_cgi that starts a sufficient number of instances of the CGI program to handle concurrent requests.
- alias provides for the mapping of different parts of the host filesystem in the document tree, and for URL redirection.
- proxy_fcgi allows Apache to forward requests to PHP-FPM.
Now restart the Apache service to apply your changes:
sudo systemctl restart apache2
At this point you have installed two PHP versions on your server. Next, you will create a directory structure for each website you want to deploy.
Step 2 — Creating Directory Structures for Both Websites
In this section, you will create a document root directory and an index page for each of your two websites.
First, create document root directories for both website.mtesthub.in and website.mtesthub.in:
sudo mkdir /var/www/creator/public_html
sudo mkdir /var/www/website/public_html
By default, the Apache webserver runs as a www-data user and www-data group. To ensure that you have the correct ownership and permissions of your website root directories, execute the following commands:
sudo chown -R root:root /var/www/creator/public_html
sudo chown -R root:root /var/www/website/public_html
sudo chmod -R 755 /var/www/creator/public_html
sudo chmod -R 755 /var/www/website/public_html
Next you will create an info.php file inside each website root directory. This will display each website’s PHP version information. Begin with site1:
sudo vi /var/www/creator/public_html/info.php
Add the following line:
/var/www/site1.your_domain/info.php
<?php phpinfo(); ?>
Save and close the file. Now copy the info.php file you created to site2:
sudo cp /var/www/creator/public_html/info.php /var/www/website/public_html/info.php
Your web server should now have the document root directories that each site requires to serve data to visitors. Next, you will configure your Apache web server to work with two different PHP versions.
Step 3 — Configuring Apache for Both Websites
In this section, you will create two virtual host configuration files. This will enable your two websites to work simultaneously with two different PHP versions.
In order for Apache to serve this content, it is necessary to create a virtual host file with the correct directives. Instead of modifying the default configuration file located at /etc/apache2/sites-available/000-default.conf, you’ll create two new ones inside the directory /etc/apache2/sites-available/.
First create a new virtual host configuration file for the website.mtesthub.in. Here you will direct Apache to render content using php7.4:
sudo vi /etc/apache2/sites-available/creator.mtesthub.in.conf
Add the following content. Make sure the website directory path, server name, and PHP version match your setup:
/etc/apache2/sites-available/creator.mtesthub.in.conf
<VirtualHost *:80>
ServerName creator.mtesthub.in
DocumentRoot /var/www/creator/public_html
DirectoryIndex index.php
<Directory /var/www/creator/public_html/>
Options FollowSymLinks MultiViews
AllowOverride All
Order allow,deny
allow from all
</Directory>
<FilesMatch \.php$>
# For Apache version 2.4.10 and above, use SetHandler to run PHP as a fastCGI process server
SetHandler “proxy:unix:/run/php/php8.0-fpm.sock|fcgi://localhost”
</FilesMatch>
ErrorLog ${APACHE_LOG_DIR}/site1.your_domain_error.log
CustomLog ${APACHE_LOG_DIR}/site1.your_domain_access.log combined
</VirtualHost>
In this file you updated the DocumentRoot to your new directory and ServerAdmin to an email that the your_domain site administrator can access. You’ve also updated ServerName, which establishes the base domain for this virtual host configuration, and you’ve added a SetHandler directive to run PHP as a fastCGI process server.
Save and close the file.
Next, create a new virtual host configuration file for the website.mtesthub.in You will specify this subdomain to deploy php8.0:
sudo vi /etc/apache2/sites-available/website.mtesthub.in.conf
Add the following content. Again, make sure the website directory path, server name, and PHP version match your unique information:
/etc/apache2/sites-available/website.mtesthub.in.conf
<VirtualHost *:80>
ServerName website.mtesthub.in
DocumentRoot /var/www/website/public_html
DirectoryIndex index.php
<Directory /var/www/website/public_html/>
Options FollowSymLinks MultiViews
AllowOverride All
Order allow,deny
allow from all
</Directory>
<FilesMatch \.php$>
# For Apache version 2.4.10 and above, use SetHandler to run PHP as a fastCGI process server
SetHandler “proxy:unix:/run/php/php8.0-fpm.sock|fcgi://localhost”
</FilesMatch>
ErrorLog ${APACHE_LOG_DIR}/site2.your_domain_error.log
CustomLog ${APACHE_LOG_DIR}/site2.your_domain_access.log combined
</VirtualHost>
Save and close the file when you are finished. Then check the Apache configuration file for any syntax errors:
sudo apachectl configtest
You’ll see the following output:
Output
Syntax OK
Next, enable both virtual host configuration files:
sudo a2ensite creator.mtesthub.in
sudo a2ensite website.mtesthub.in
Now disable the default site, since you won’t need it.:
sudo a2dissite 000-default.conf
Finally, restart the Apache service to implement your changes:
sudo systemctl restart apache2
Now that you have configured Apache to serve each site, you will test them to make sure the proper PHP versions are running.
Step 4 — Testing Both Websites
At this point, you have configured two websites to run two different versions of PHP. Now test the results.
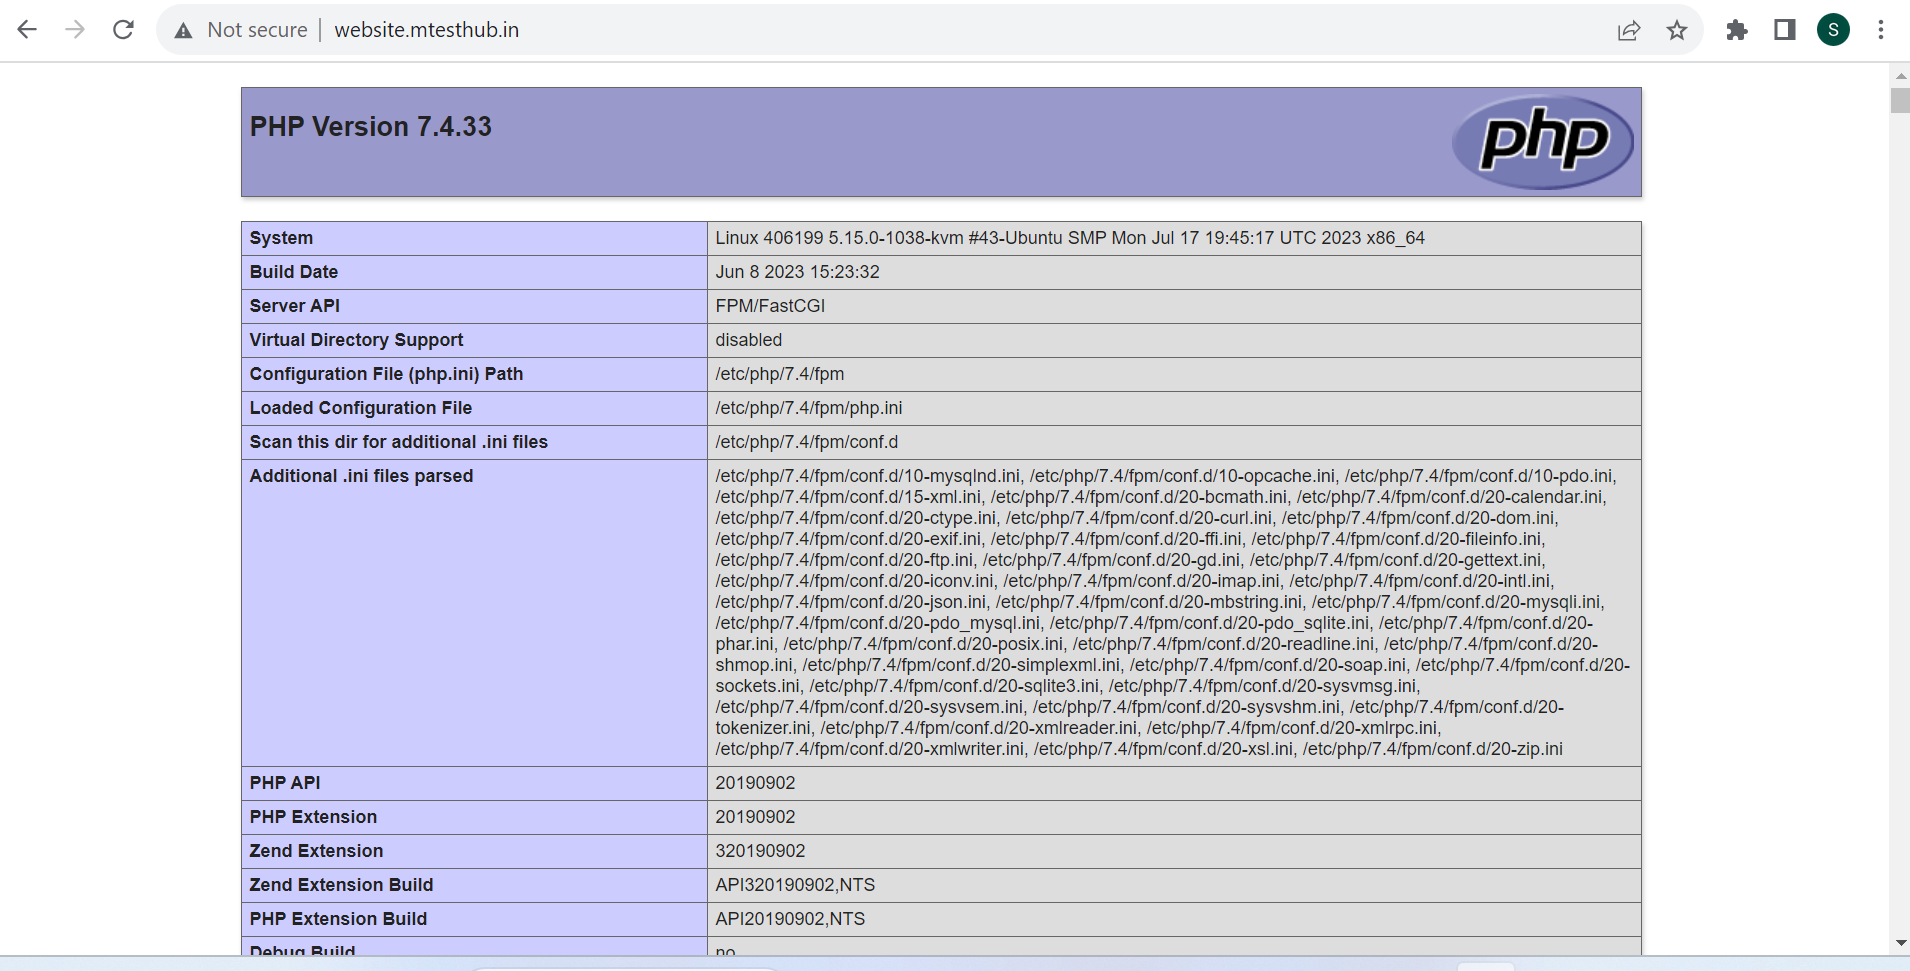
Open your web browser and visit both sites http://creator.mtesthub.in and http://website.mtesthub.in. You will see two pages that look like this:


Note the titles. The first page indicates that creator.mtesthub.in deployed PHP version 8.0. The second indicates that website.mtesthub.in deployed PHP version 7.4
Now that you’ve tested your sites, remove the info.php files. Because they contain sensitive information about your server and are accessible to unauthorized users, they pose a security threat. To remove both files, run the following commands:
sudo rm -rf /var/www/creator/public_html/info.php
sudo rm -rf /var/www/website/public_html/info.php
You now have a single Ubuntu 22.04 server handling two websites with two different PHP versions. PHP-FPM, however, is not limited to this one application.