
Step by Step Installation of Oracle Linux in Virtual Machine
Oracle Linux Operating System Installation
1. Firstly boot up with the relevant Oracle Linux ISO image. On boot up the initial installation screen of ORACLE LINUX appears as below (Figure 1.1), prompting for selecting the type of installation to proceed with. Let us proceed with default “ Install Oracle Linux 8.6.0” press enter key to proceed further.The resulting console window will contain the Oracle Linux boot screen.
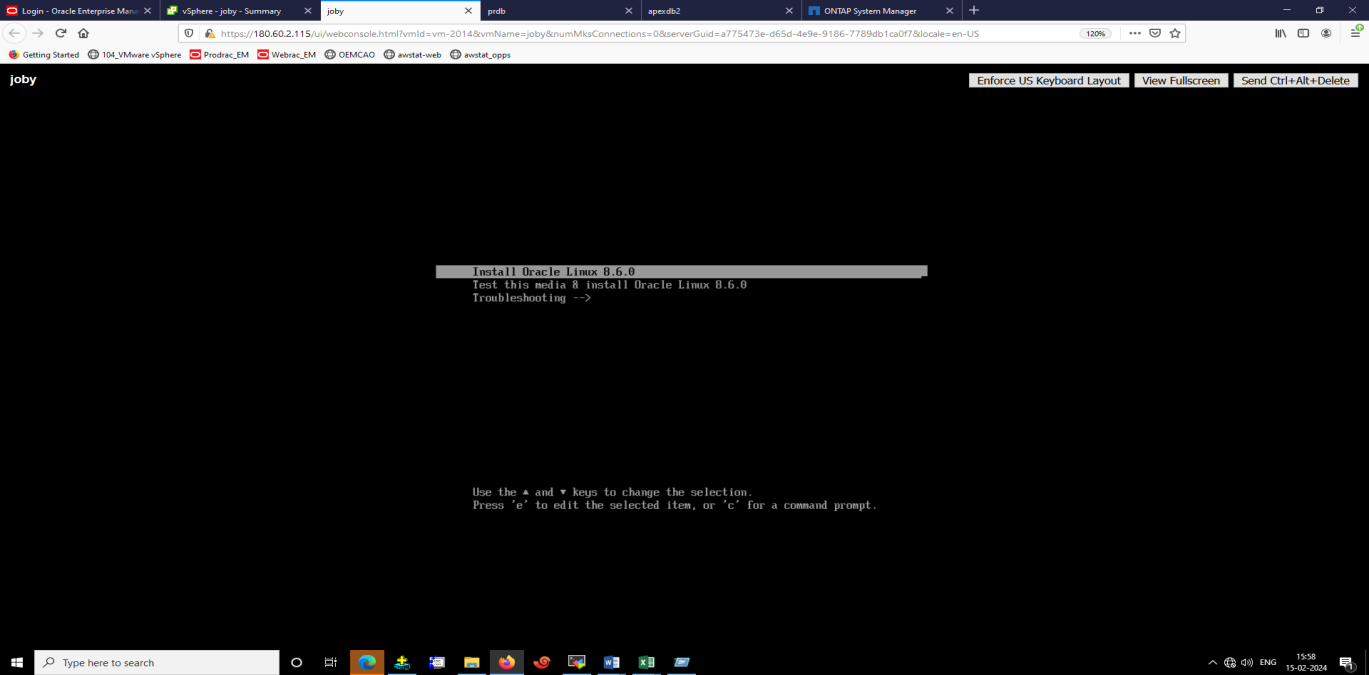
Figure 1.1
2. The next screen (Figure 1.2) for selection of the language to be used during the installation process, select “English(India)” and click “next” to proceed.
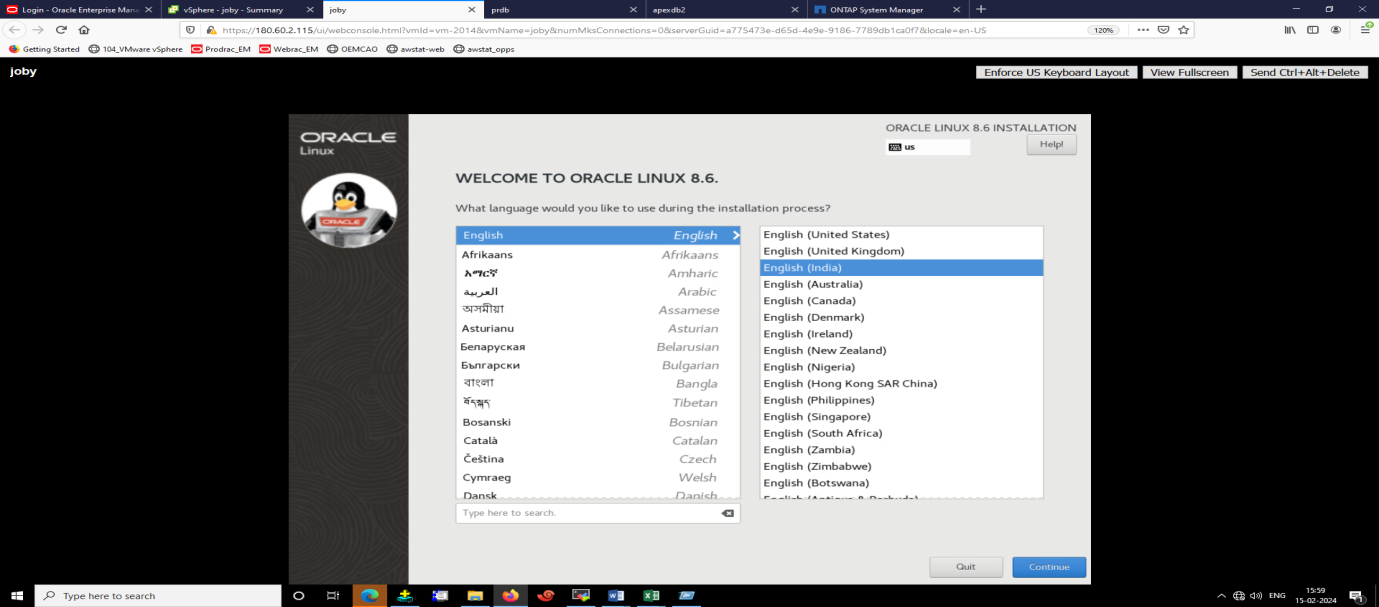
Figure 1.2
3. The next screen is the installation summary. Click on Installation Destination (Figure 1.3).
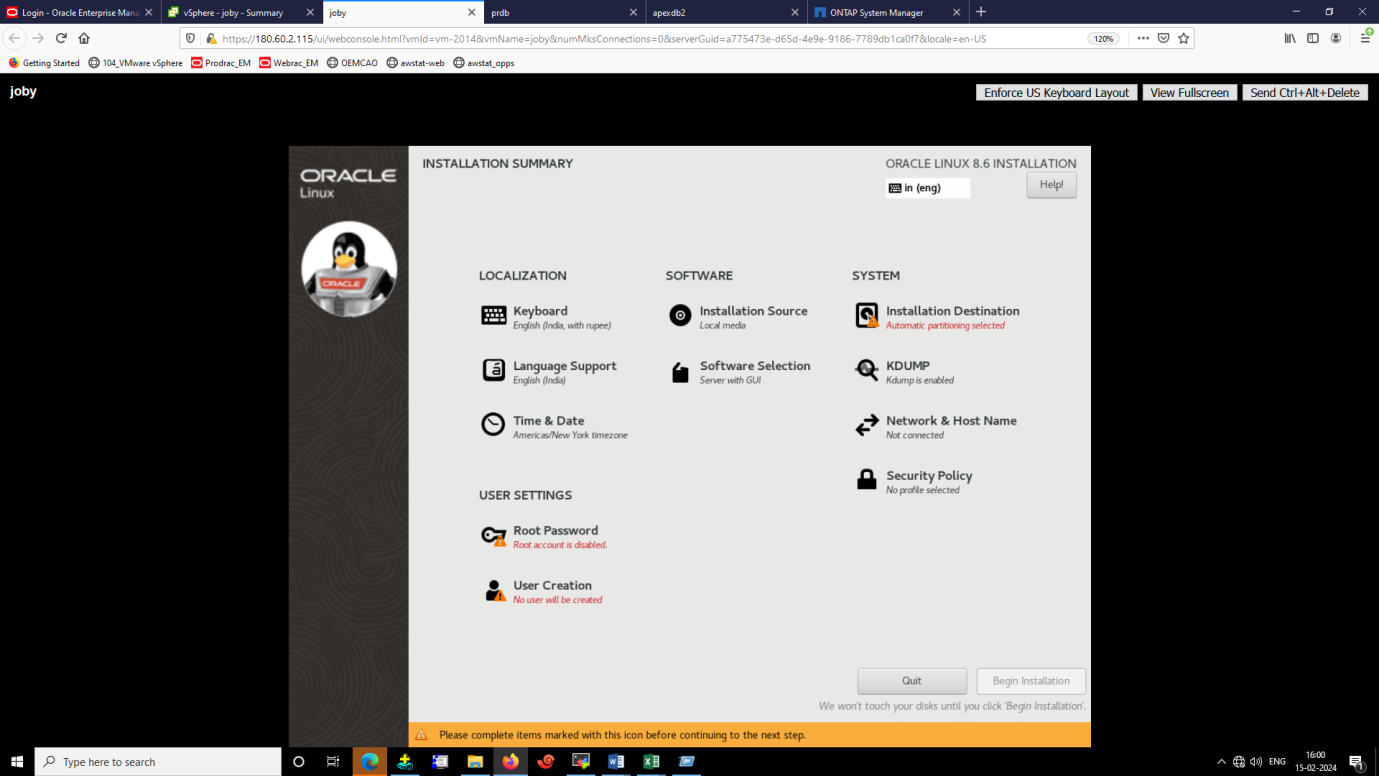
Figure 1.3
4. The next screen is Installation Destination .There are two option available, “Automatic Partitioning” and “Custom”. If you select “Automatic Partitioning” the partitions will be automatically created with all available space in the system. If you select “Custom” you will be given the option for creating the partitions manually as per the requirement, let us proceed with the second option “Custom”(Figure 1.4).
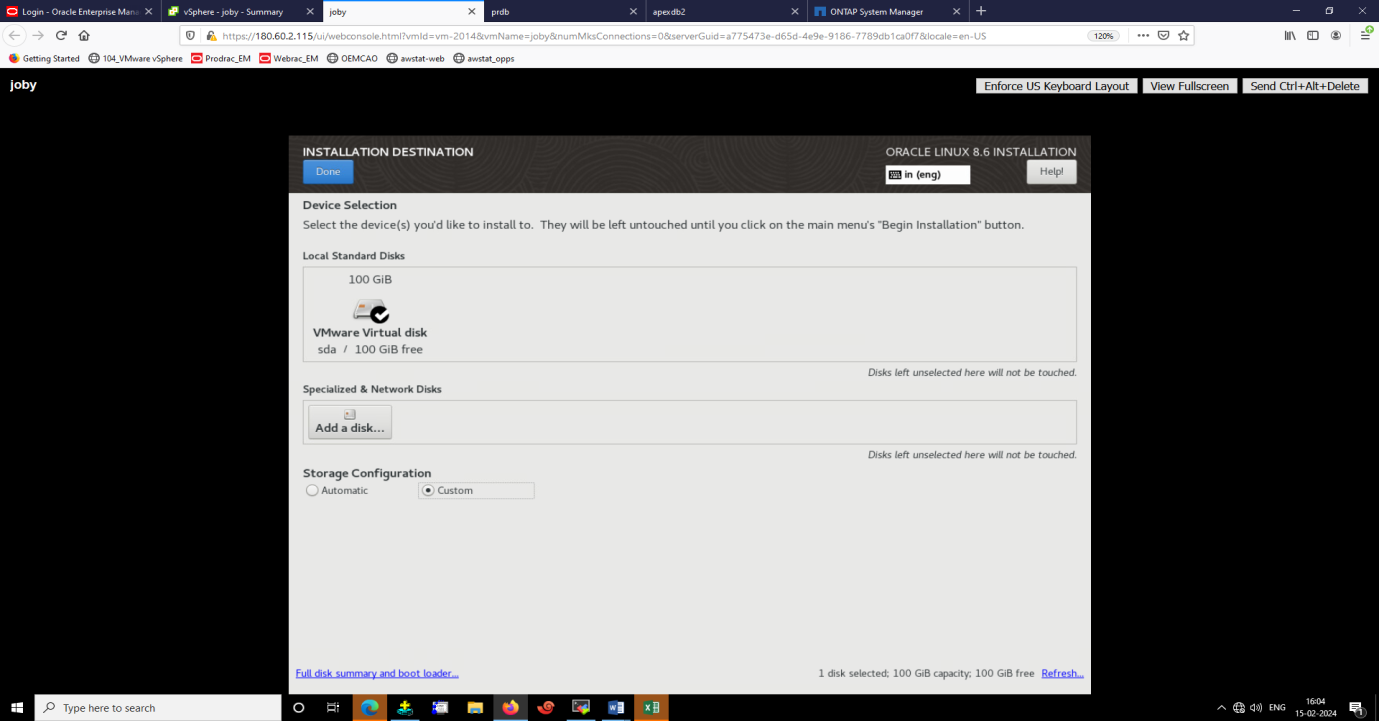
(Figure 1.4)
5. The next screen is Manual Partitioning. To setup the new mount points. Select Standard Partition (Figure 1.5).Select the “Available Space” and Click on “ + “ to create a new partition, you can create partitions as per your requirements.
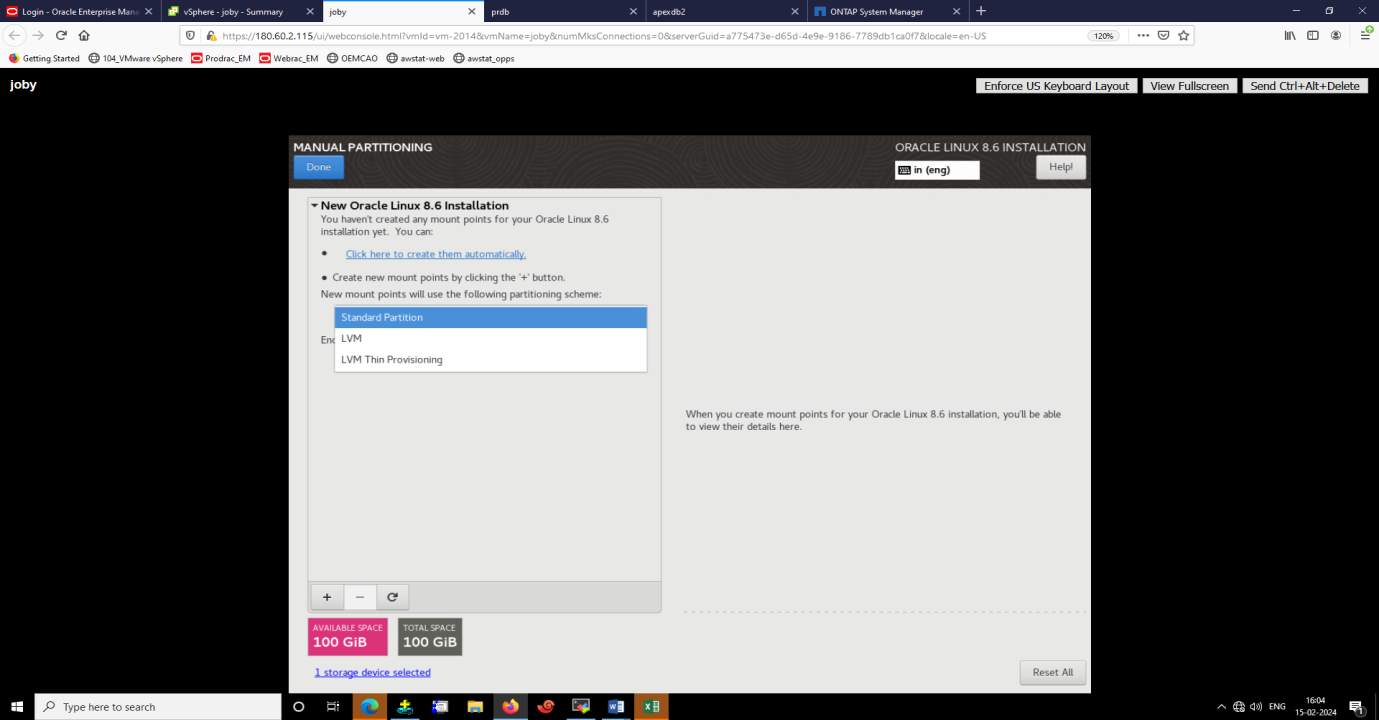
(Figure 1.5)
6. On selection of New Partition, you will be prompted to provide mount point, type of file system and size of the partition to be created. Here you are creating the root partition with “/” in the mount point, select “ext4” as the file system type, inLinux the file system type is ext4. You can specify the size of the partition as per your requirement, may vary as per the available space in the system. Click “Add mount point” to create partition (Figure 1.6).
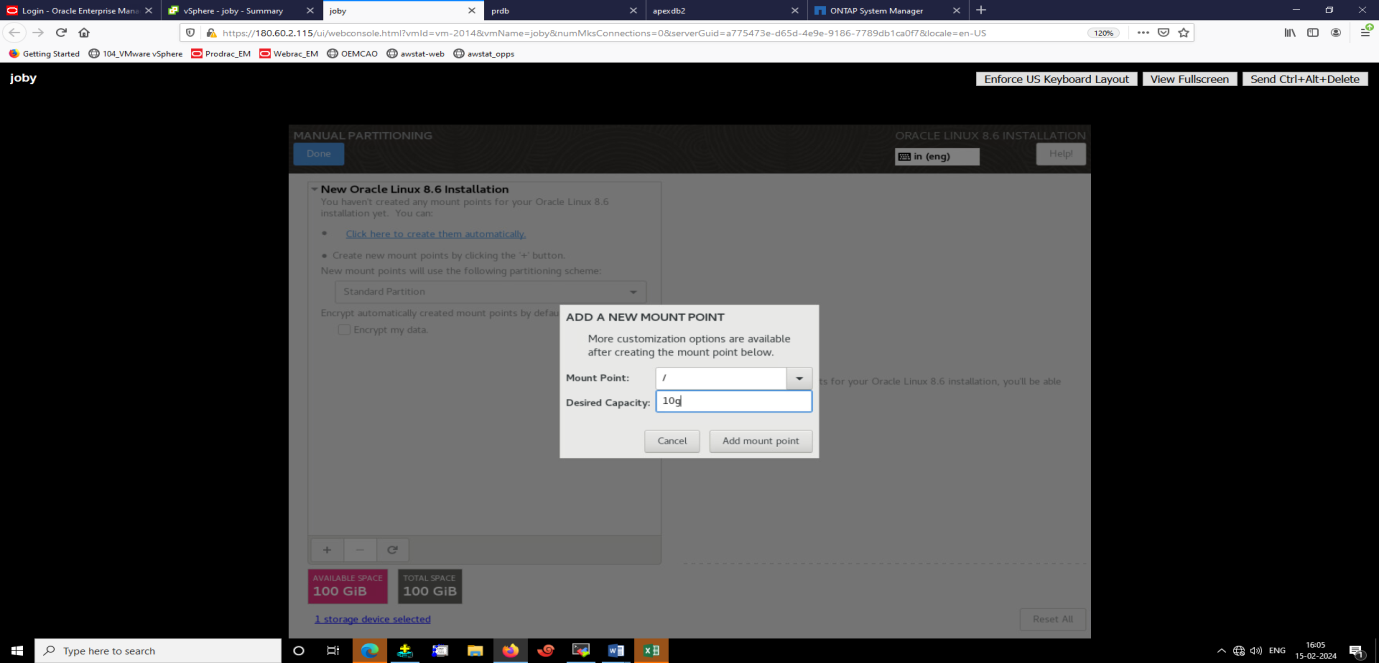
(Figure 1.6)
7. One Partion for swap space is to be created,no mount is to be spaecified,in the File system Type select “swap” and specify the size to be alloted as swap (Figure 1.7&1.8).Swap space is dependent on the RAM available in the system.
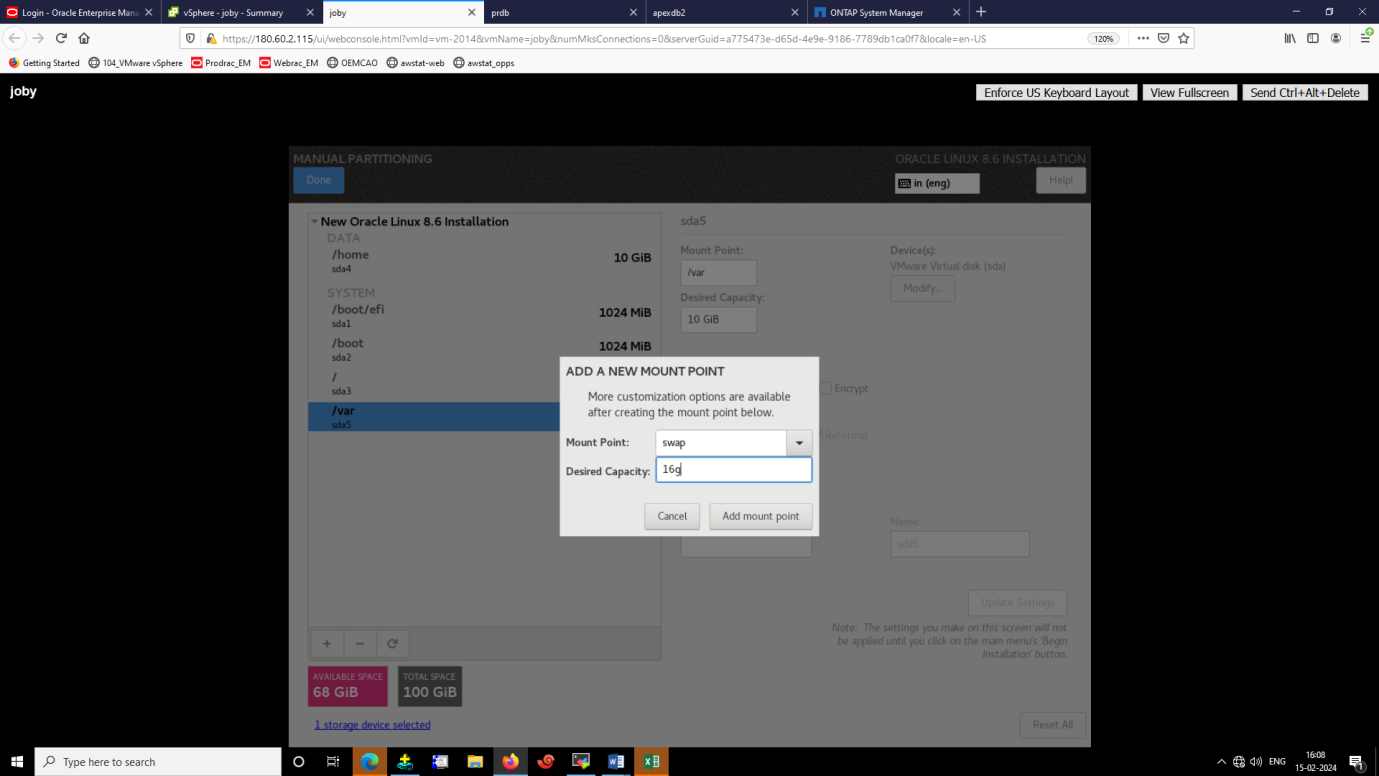
(Figure 1.7)
(Figure 1.8)
8. Create more partitions as required here you are creating a partition “/u01” with a required size(Figure 1.9).

Figure 1.9
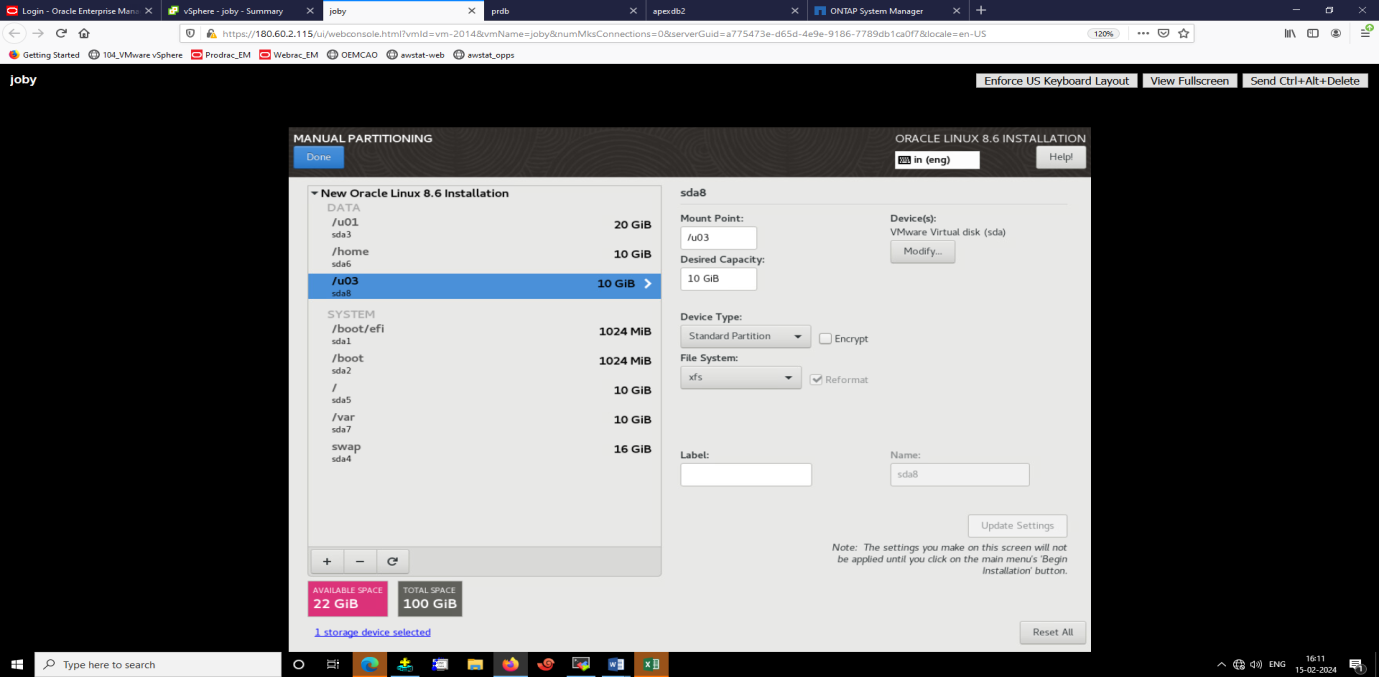
9. Create more partitions as required here you are creating a partition “/u03” with a required size(Figure 1.10).Click on “Done” to continue.
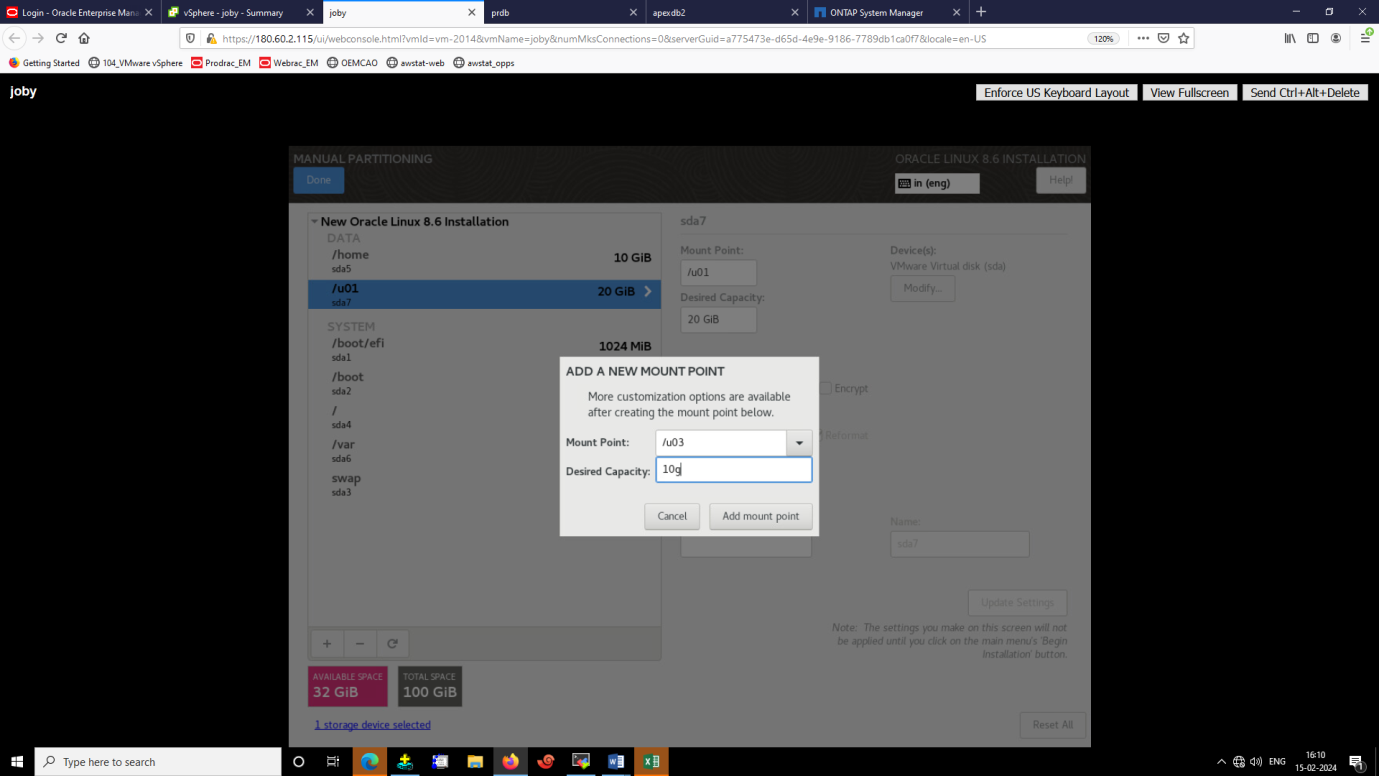
Figure 1.10
10. After creating all the required partition, click “Accept Changes” (Figure 1.11). The next screen shows the dummy partitions created during installation, this will vary as per requirements and disk space available in various systems.
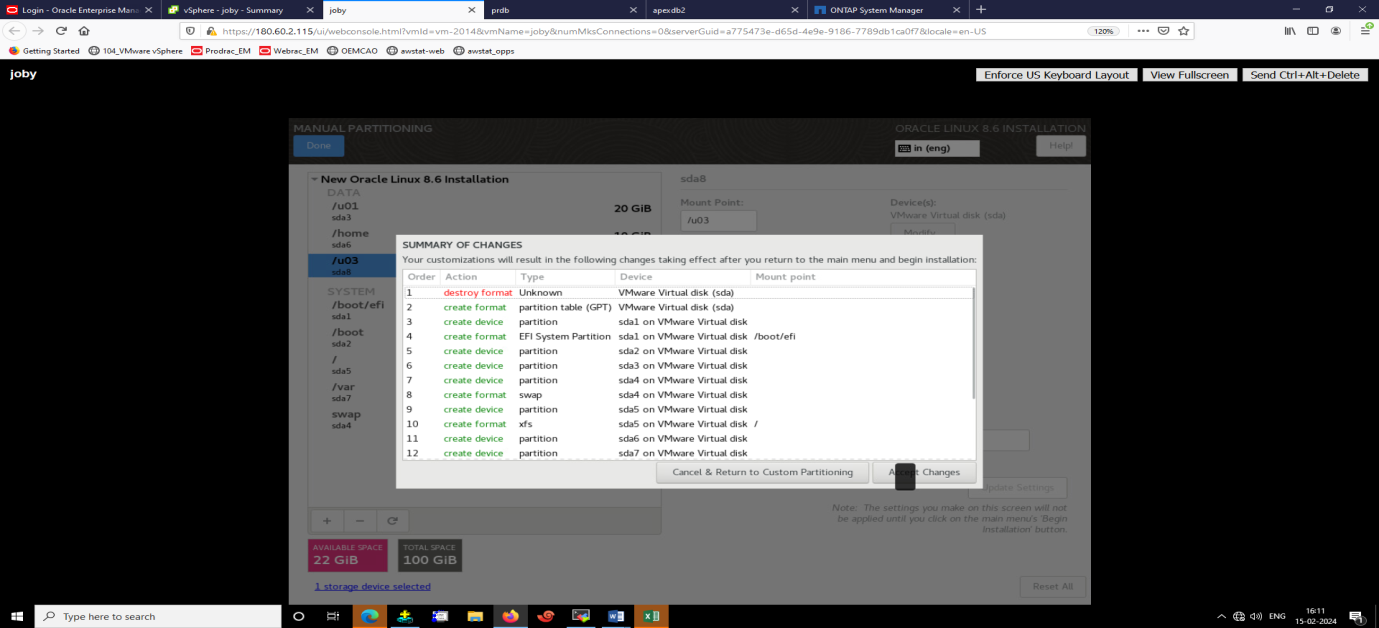
Figure 1.11
11. Time zone Selection, to set the time zone click on India map and select “Asia/Calcutta” (Figure 1.12).Click “Done” to continue.


Figure 1.12
12. Once the Time Zone is set, you will have to set the password for the root user who is the super user of the system which you are installing (Figure 1.13). Set the password and click “Done”. Do not forget the password.

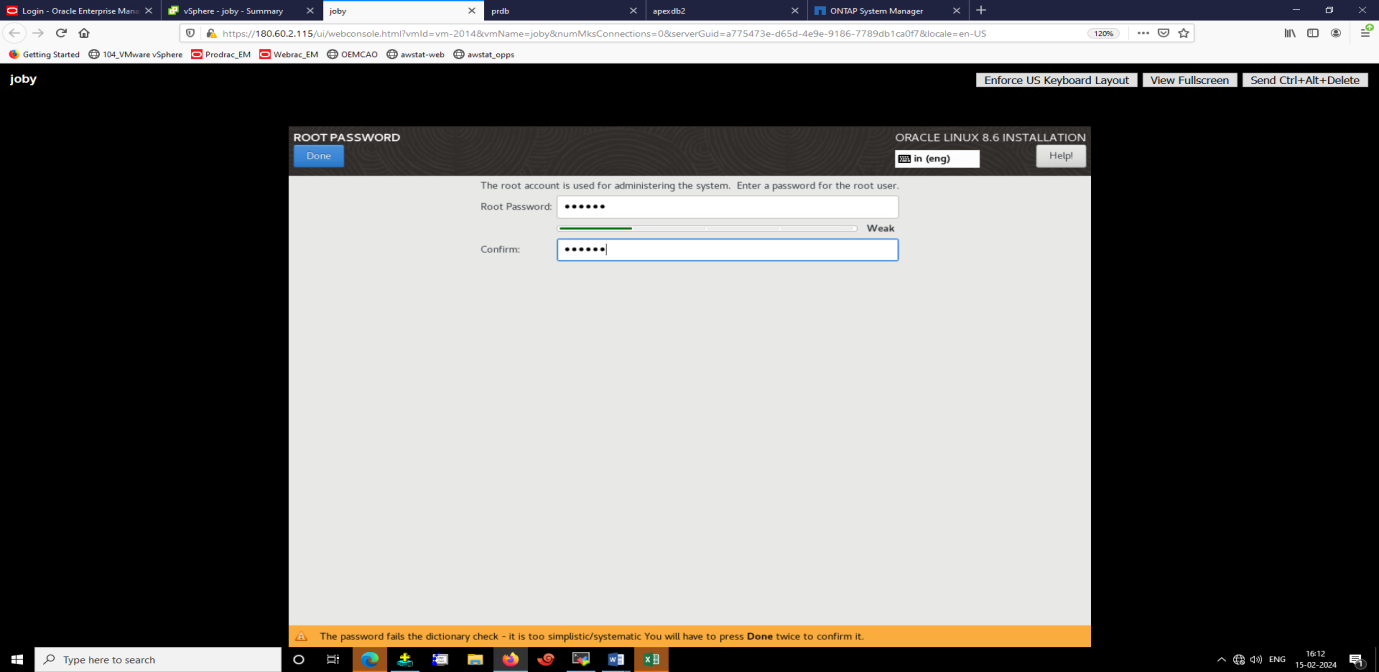
Figure 1.13
13. After setting the password for the root user, it’s time to install the required packages. Click on “Software Selection” and select “Server with GUI” you will be prompted to select the required software packages to be installed. You can select all the available software packages (Figure 1.14).
Click “Done” to Continue.
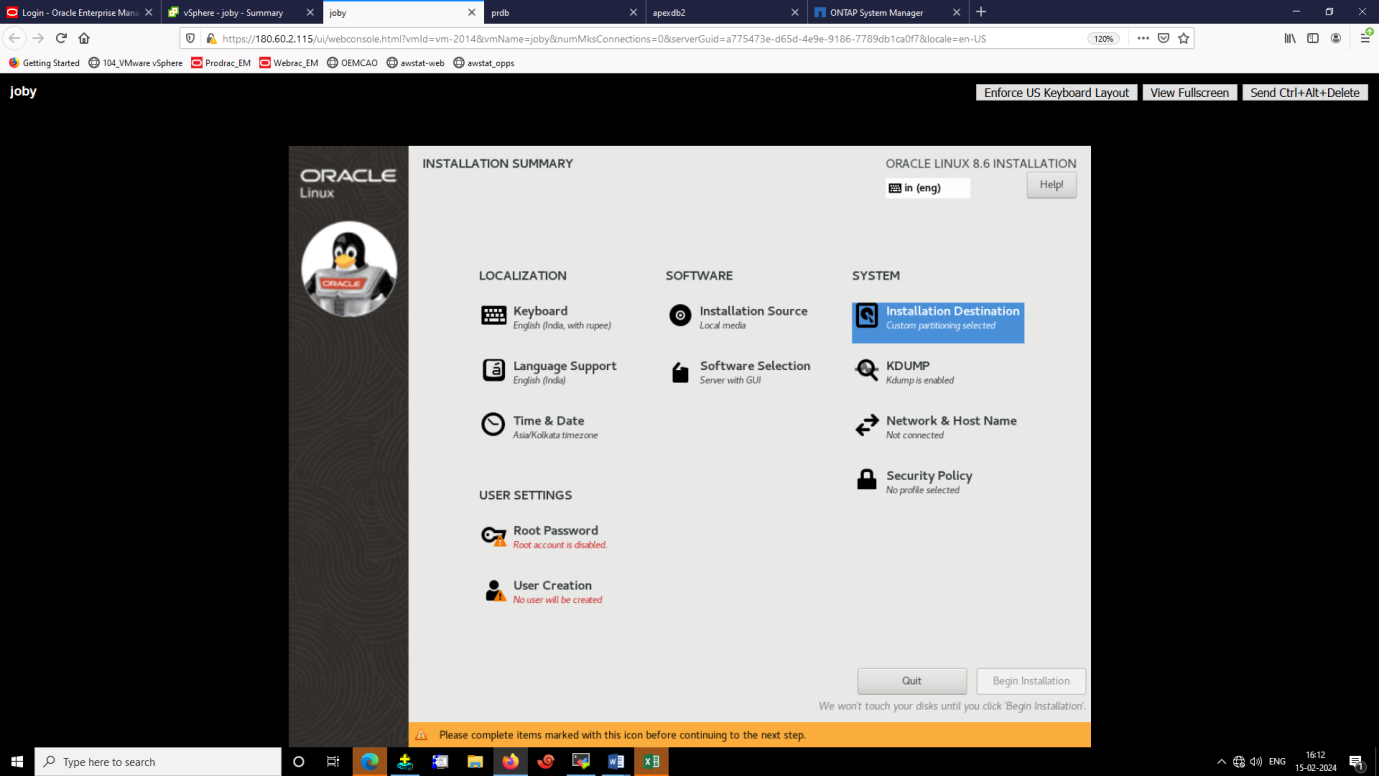
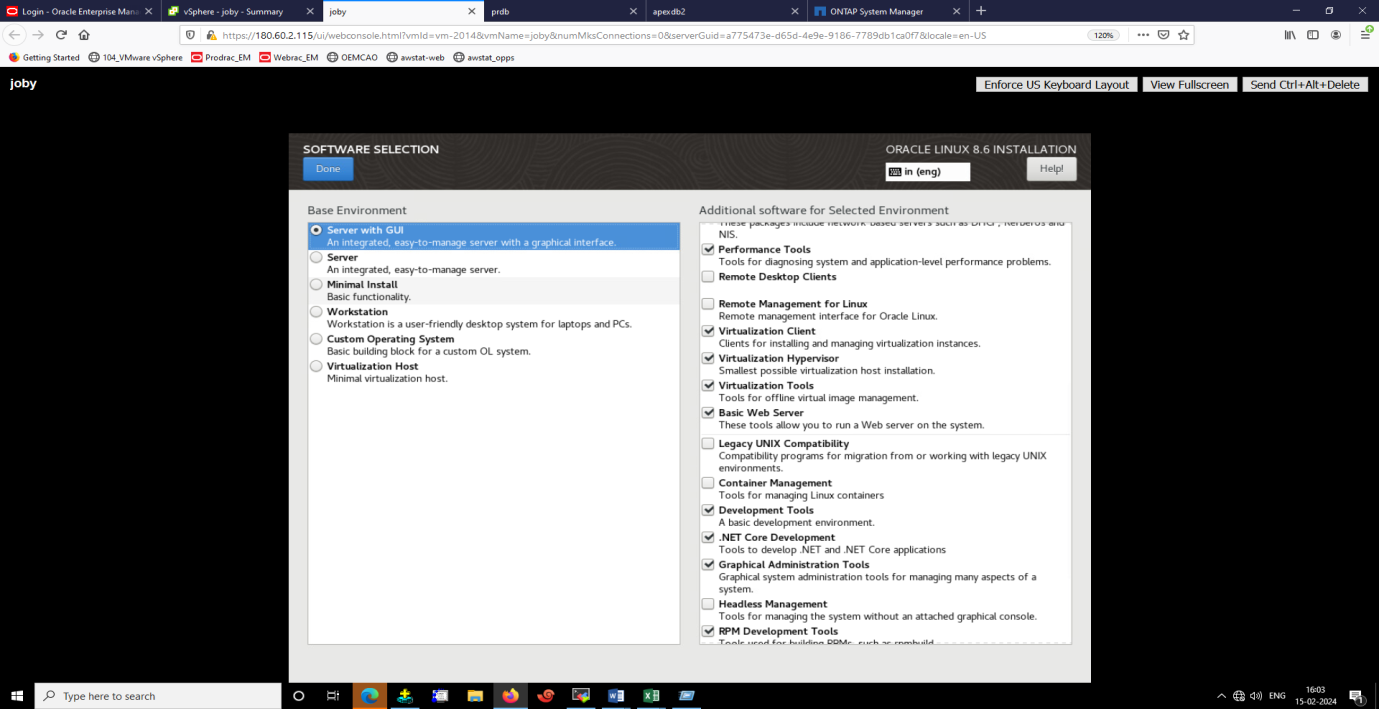
Figure 1.14
14. After selecting all the options in installation summary click on “Begin Installation” (Figure 1.15)
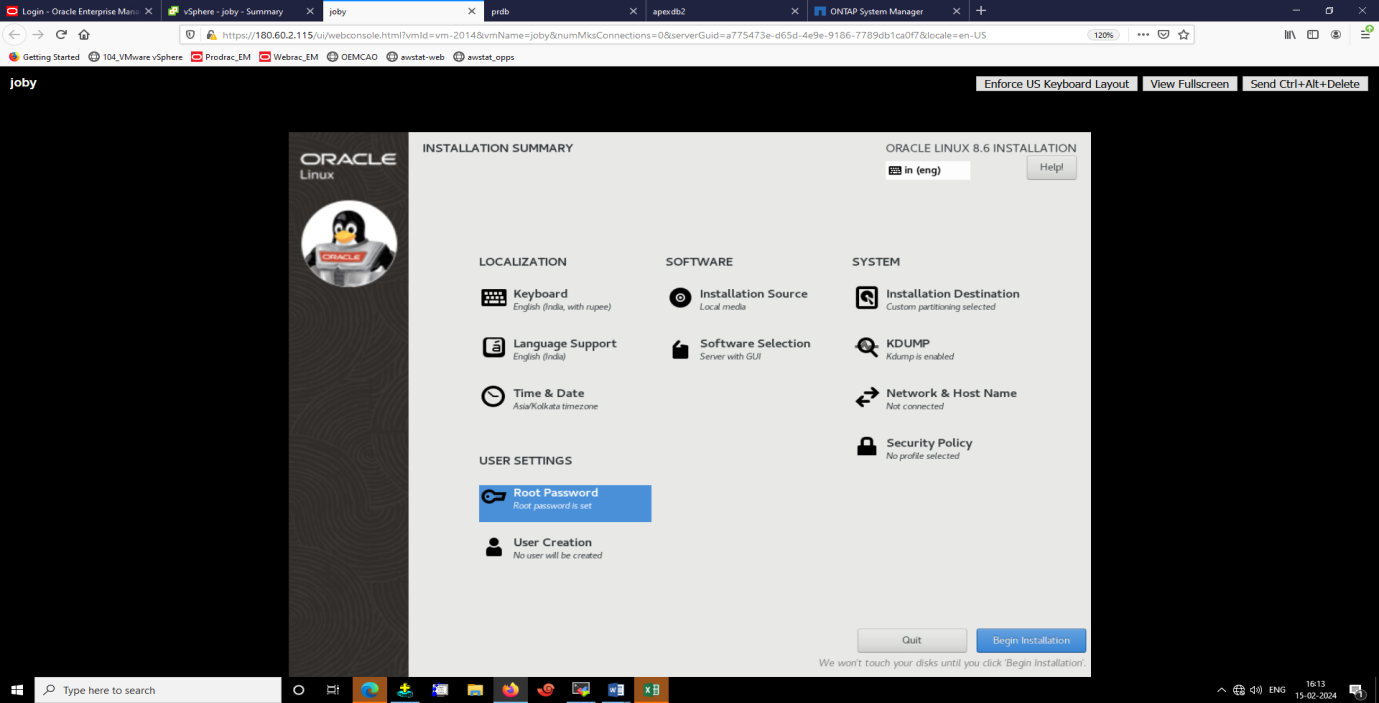
Figure 1.15
15. After checking the dependencies, the installation of Linux will start (Figure 1.16).

Figure 1.16
16. After Completion of installation to proceed further click on “Reboot System” (Figure 1.17).

Figure 1.17